Create Views
To add a custom view to the .prc portion of a .pdf document:
-
Create a view object and add it to the file structure and to the product occurrence:
          OdPrcViewPtr pNewView = OdPrcView::createObject();
          pNewFileStructure->addObject(pNewView);
          OdPrcName name;
          name.setName(L"NE Isometric");
          pNewView->name() = name;

          OdPrcProductOccurrencePtr productOc = pFile->fileStructures().last()->fileStructureTree().productOccurrence().last();
          OdPrcObjectIdArray &arr_view = productOc->annotationViews();
          arr_view.push_back(pNewView->id());
Note that it is important to set the name of the view. The view is available in the .pdf file through its name.
- Add to the file structure a set of parameters for a scene display and associate
this parameter set with the previously created view object:
OdPrcSceneDisplayParametersPtr pSceneDisplayParameters = OdPrcSceneDisplayParameters::createObject(); pNewFileStructure->addObject(pSceneDisplayParameters); pNewView->sceneDisplayParameters() = pSceneDisplayParameters->id(); - Create a camera object, and add it to the file structure:
OdPrcCameraPtr pCamera = OdPrcCamera::createObject(); pNewFileStructure->addObject(pCamera); - Set the camera's target, up vector and position. Then associate the camera
with the view:
          pCamera->lookAt().set(0.0, 0.0, 0.0);
          pCamera->up().set(0.0, 0.0, 1.0);
          pCamera->location().set(5.0, 5.0, 5.0);
          pCamera->setXFov(1.0472);
          pCamera->setYFov(1.0472);
          pSceneDisplayParameters->camera() = pCamera->id();
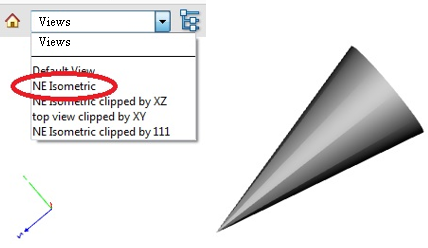
You can choose the created view in a viewer application by its name:
 |
|
|
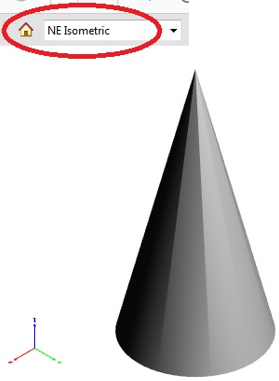
After selecting the created view, you can see the result:
 |
|
|
For additional details, in the examples see the simpleCrossSectioExample() function in the CrossSectionExample.cpp module.
See Also
Add Cross Sections for ViewsWork with Views