This guide walks you through creating your first C++ application with ODA BimRv SDK. It describes how to create a simple console application for the Win64 platform using Visual Studio 2017. The application reads an .rvt/.rfa file ("test.rvt") located in the application folder and writes a copy of this file with another name ("test_copy.rvt").
To design and run your first ODA BimRv SDK custom application:
- Create a new project in Visual Studio.
- Set project options.
- Add source code to the project.
- Build your solution and run the output application.
It is assumed that the application folder already contains an .rvt file named test.rvt. After running the sample application, it should create another file named test_copy.rvt that duplicates the original file.
Creating a New Project in Visual Studio
The simplest way to create a new ODA BimRv SDK application is to add it to the examples solution that is provided in the ODA BimRv SDK archive.
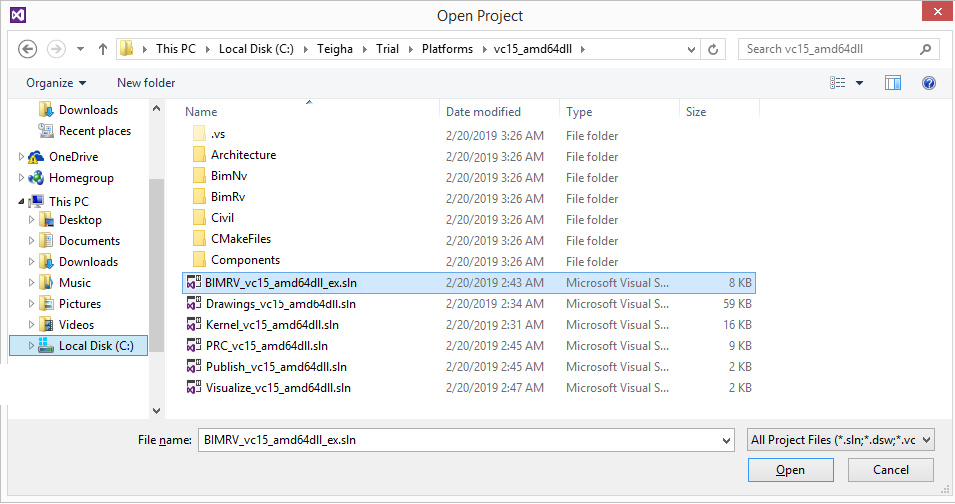
This solution is located in the \Platforms\vc15_amd64dll folder (for the Microsoft Visual Studio 2017 archive).
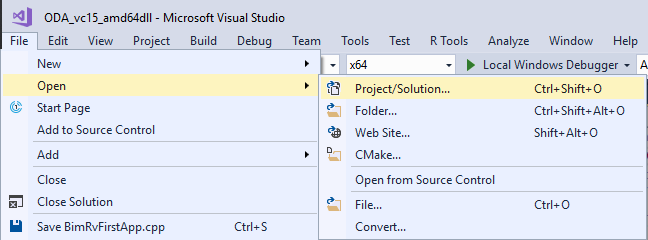
To open this solution in Visual Studio, choose FILE —> Open —> Project/Solution, then select and open the BIM_vc15_amd64dll_ex.sln file.
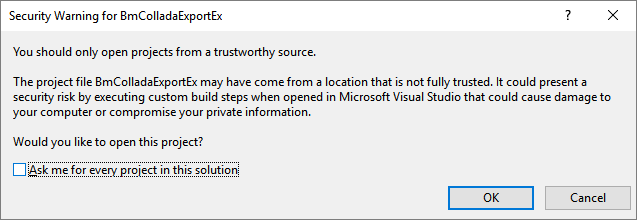
You may be prompted with a security warning about opening the solution. Uncheck Ask me for every project for this solution;
and click the OK button.
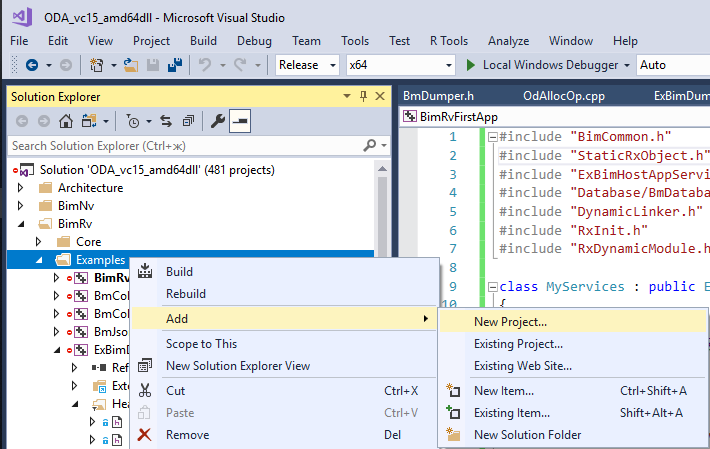
To create a new project and add it to the solution, right-click and select Add —> New Project.
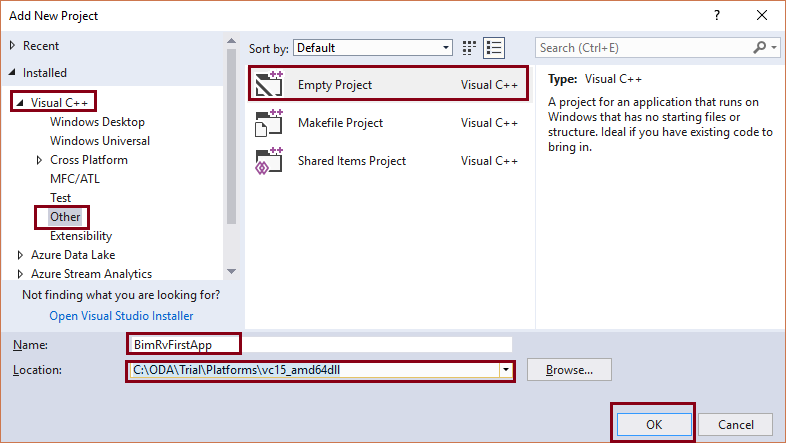
In the dialog, select the Visual C++ —> Other in the left part of the window,
then select Empty Project as an application type,
set the new project name (for example, BimRvFirstApp) in the Name
textbox and specify the project file location in the Location textbox.
It is recommended to locate project files in the \Platforms\vc15_amd64dll\BimRv\Examples folder.
If you use a ODA BimRv SDK archive for another version of Microsoft Visual Studio, vc15_amd64dll should be replaced with the appropriate name.
Your new console application project is created and added to the ODA BimRv SDK examples solution.
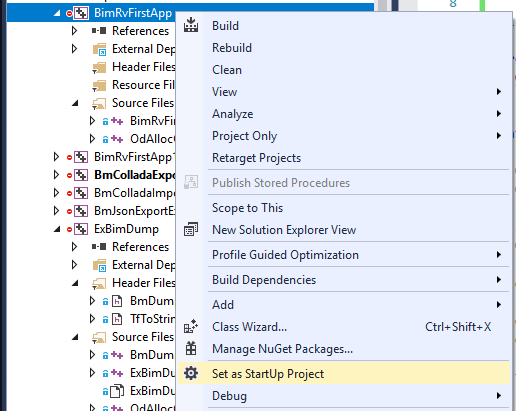
You can set the new project as a startup project to have it active every time you open the solution.
Right-click the project name and choose the Set as Startup Project option.
Now your project is ready for you to set its properties and add source code.
Setting Project Options
After creating your Visual Studio project, you need to set several options for it.
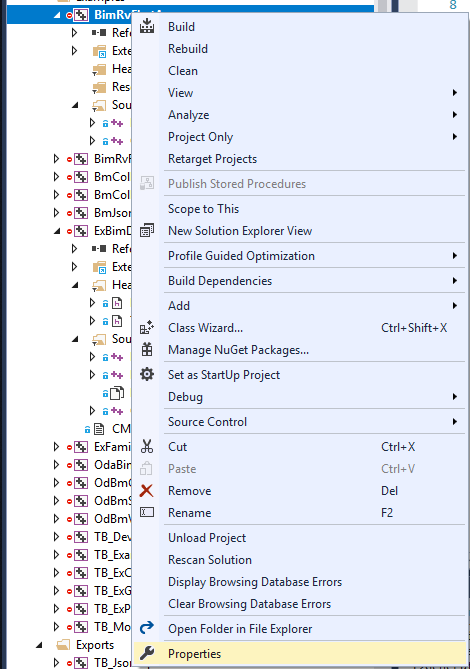
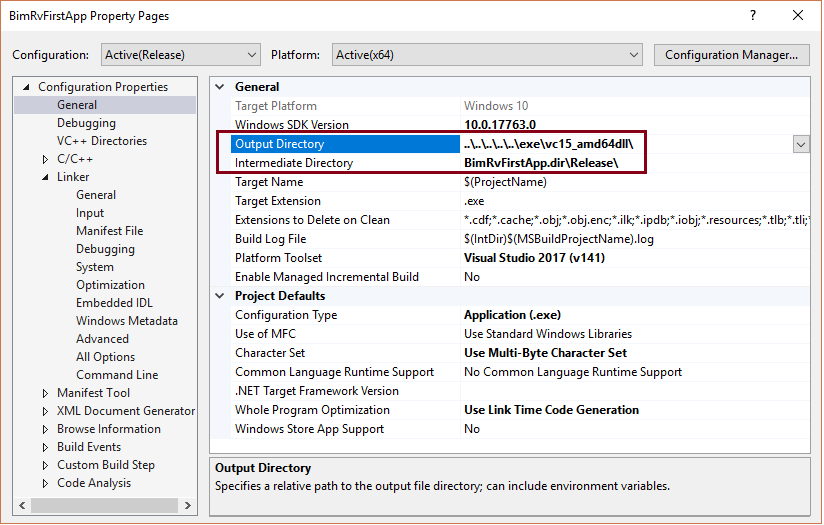
First, specify the output parameters: paths for binary files and intermediate files. Right-click the project name and choose the Properties option.
In the left part of the dialog, select Configuration Properties —> General
and set the Output Directory and the Intermediate Directory properties in the right part of the window.
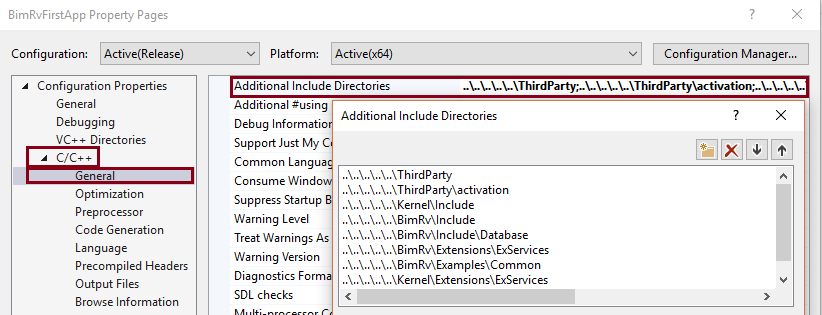
Next set the include folders on the C/C++ —> General page.
Add the following folders for searching ODA BimRv SDK header files:
..\..\..\..\..\ThirdParty..\..\..\..\..\ThirdParty\activation..\..\..\..\..\Kernel\Include..\..\..\..\..\BimRv\Include..\..\..\..\..\BimRv\Include\Database..\..\..\..\..\BimRv\Extensions\ExServices..\..\..\..\..\BimRv\Examples\Common..\..\..\..\..\Kernel\Extensions\ExServices
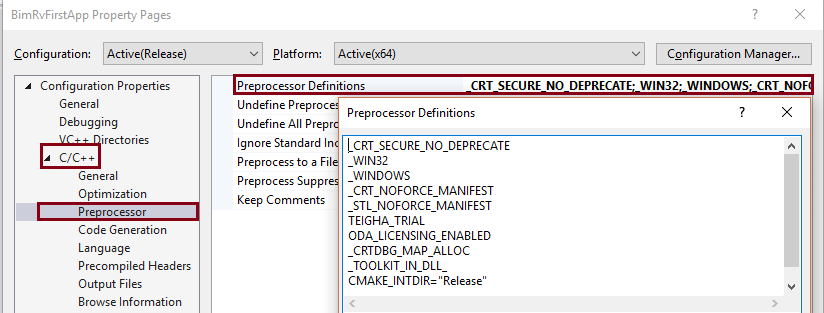
Also add special preprocessor directives
(C/C++ —> Preprocessor, Preprocessor Definitions):
_CRT_SECURE_NO_DEPRECATE_WIN32_WINDOWS_CRT_NOFORCE_MANIFEST_STL_NOFORCE_MANIFESTTEIGHA_TRIALODA_LICENSING_ENABLED_CRTDBG_MAP_ALLOC_TOOLKIT_IN_DLL_CMAKE_INTDIR="Release"
Add the TEIGHA_TRIAL preprocessor directive only if you are using the trial version of ODA BimRv SDK.
If you omit this definition, you'll get an error about the OdActivationInfo file while compiling.
If you use the common ODA BimRv SDK archive, don't forget to generate activation files at the Open Design Alliance website
and place them in the ThirdParty\activation folder (or another folder that can be found by your compiler).
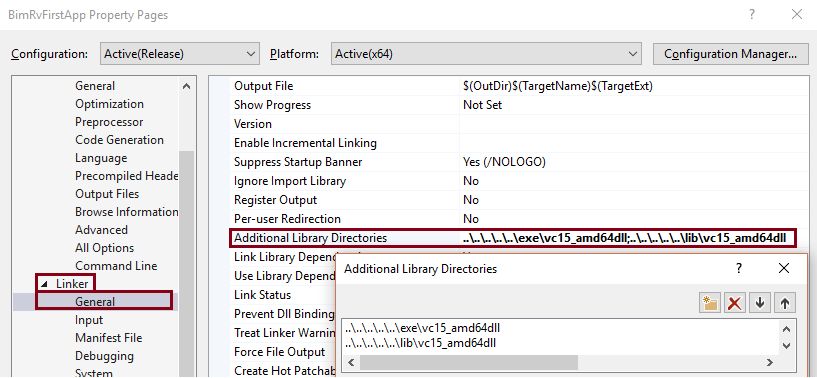
Next specify additional folders for searching ODA BimRv SDK binary libraries at the linking stage:
..\..\..\..\..\exe\vc15_amd64dll..\..\..\..\..\lib\vc15_amd64dll
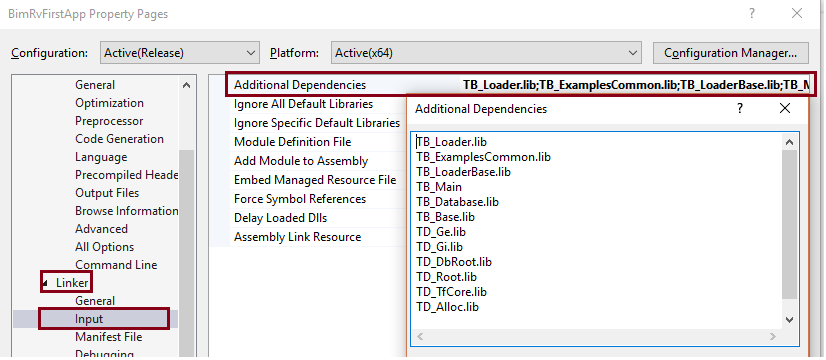
Then add the libraries that are necessary for your application:
TB_Loader.libTB_ExamplesCommon.libTB_LoaderBase.libTB_Main.libTB_Database.libTB_Base.libTD_DbRoot.libTD_Root.libTD_TfCore.libTD_Alloc.libTB_Common.lib;
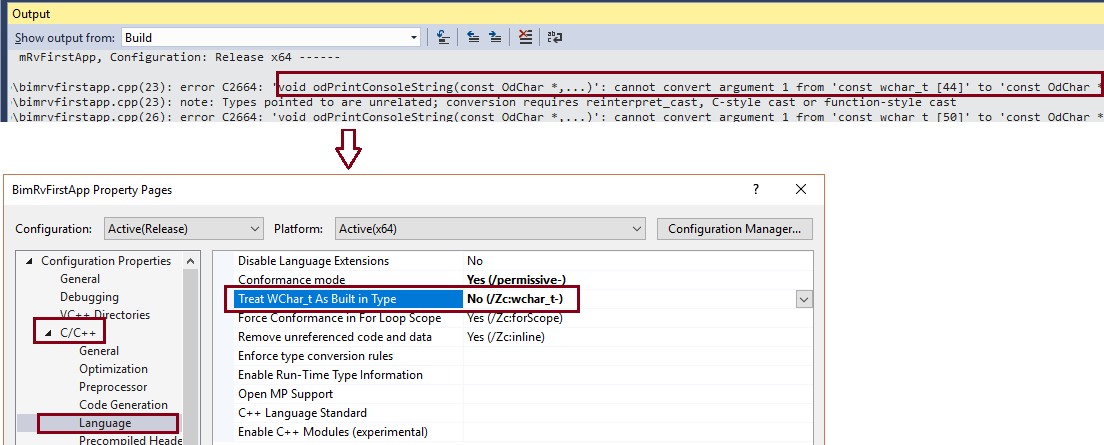
If your application uses the console output function from the application HOST services, set the option for using wchar_t datatype in your project.
This avoids the linker error when using the odPrintConsoleString() function.
Now your project is ready for adding application source code.
Adding Your Application Source Code
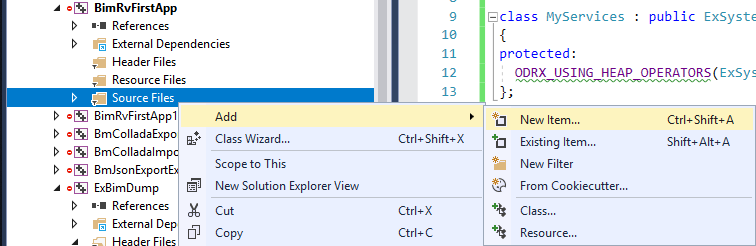
Your first ODA BimRv SDK application will contain one source code file: BimRvFirstApp.cpp. To add this file to the project, right-click the Source Files section
in Solution Explorer and choose Add —> New Item.
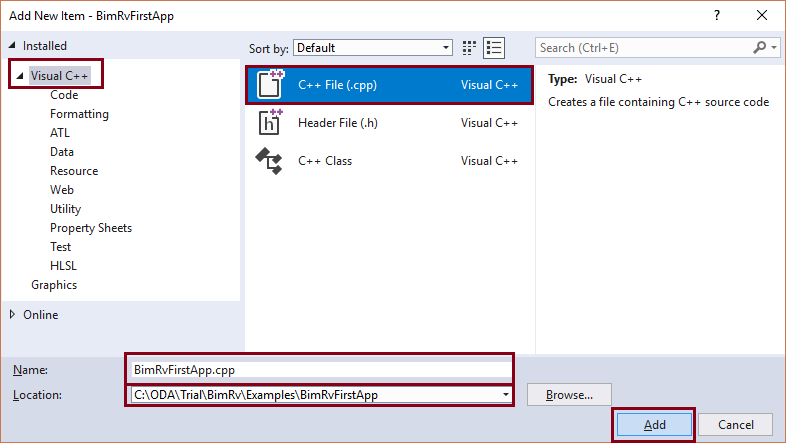
In the Add New Item dialog, select the C++ File (.cpp) type, then specify the file name and location. It is recommended to locate your source file in the
\BimRv\Examples\BimRvFirstApp folder. Then click the Add button.
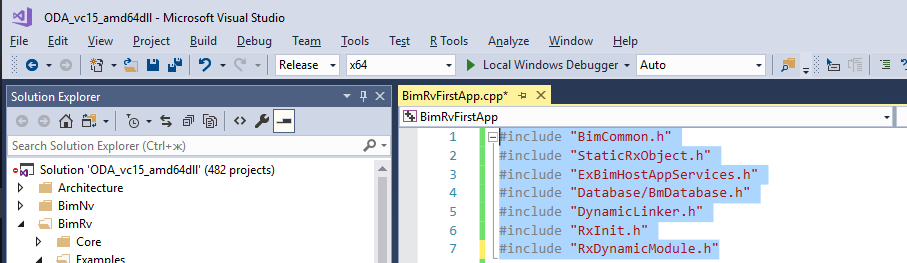
Double-click the newly created source file in Solution Explorer to open it and add ODA BimRv SDK include files to it:
#include "BimCommon.h"
#include "StaticRxObject.h"
#include "ExBimHostAppServices.h"
#include "Database/BmDatabase.h"
#include "DynamicLinker.h"
#include "RxInit.h"
#include "RxDynamicModule.h"
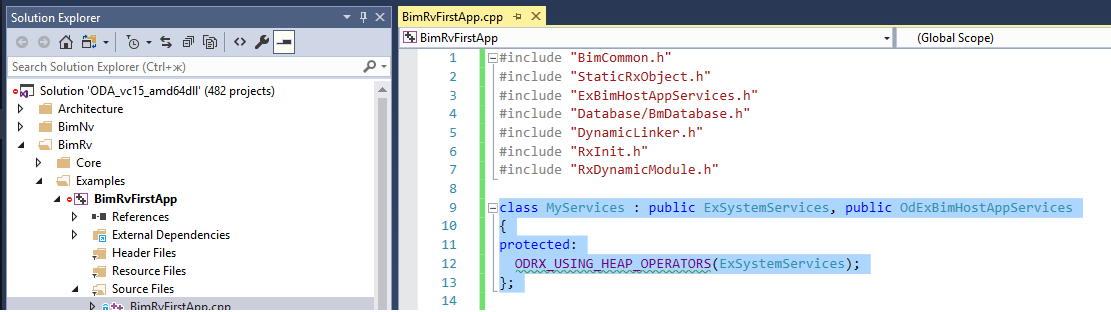
Next define a custom service class, inherited from the ExSystemServices and OdExBimHostAppServices
classes, to get access to platform-dependent functionality (such as reading and writing files):
class MyServices : public ExSystemServices, public OdExBimHostAppServices
{
protected:
  ODRX_USING_HEAP_OPERATORS(ExSystemServices);
};
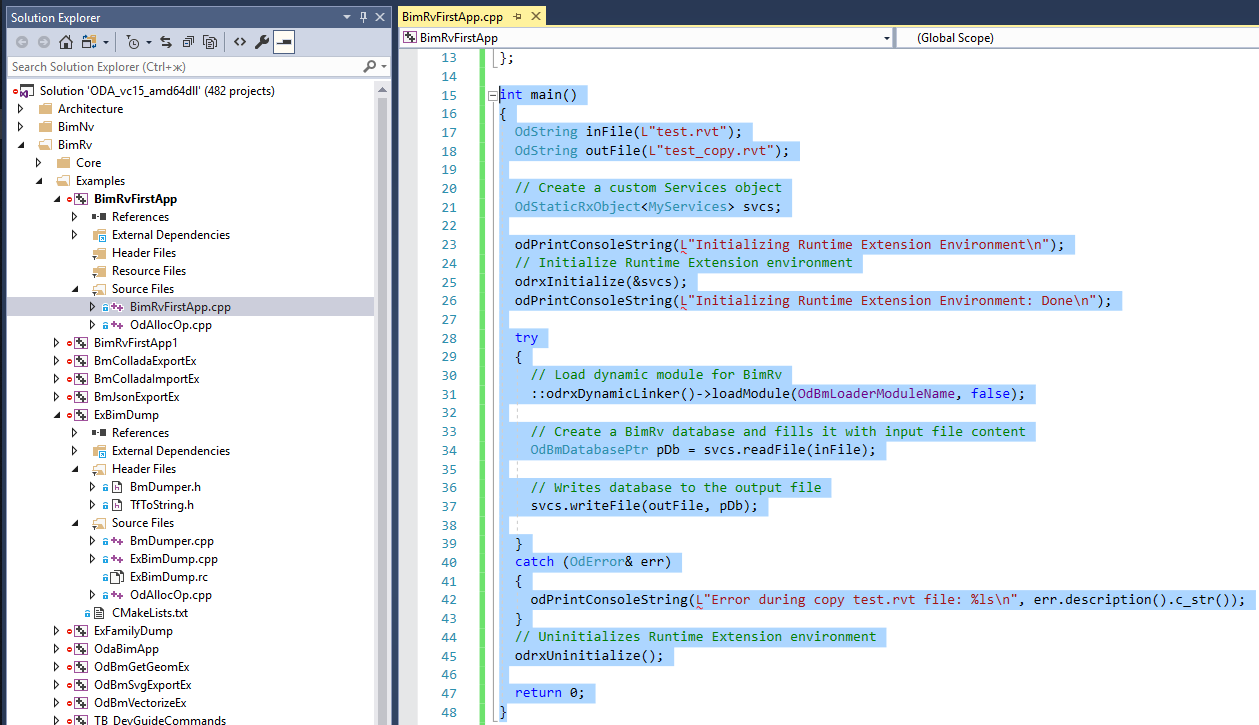
Now create a main() function that contains the application functionality:
int main()
{
  OdString inFile(L"test.rvt");
  OdString outFile(L"test_copy.rvt");

  // Create a custom Services object
  OdStaticRxObject < MyServices > svcs;

  // Initialize Runtime Extension environment
  odrxInitialize(&svcs);

  try
  {
    // Load dynamic module for BimRv
    ::odrxDynamicLinker()->loadModule(OdBmLoaderModuleName, false);

    // Create a BimRv database and fills it with input file content
    OdBmDatabasePtr pDb = svcs.readFile(inFile);

    // Writes database to the output file
    svcs.writeFile(outFile, pDb);

  }
  catch (OdError& err)
  {
    odPrintConsoleString(L"Error during copy test.rvt file: %ls\n", err.description().c_str());
  }
  // Uninitializes Runtime Extension environment
  odrxUninitialize();

  return 0;
}
Save your changes in the BimRvFirstApp.cpp file.
You can also use the full text
of the source code file to copy and insert it to your application.
Building and Running Your First Application
To build your application, choose Build —> Build BimRvFirstApp.
After the build is completed successfully, your application is ready to start from the \exe\vc15_amd64dll folder.
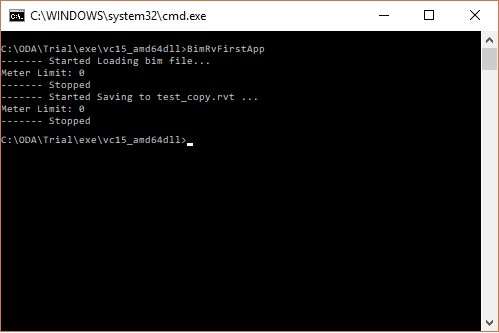
You can run your application by calling BimRvFirstApp from a command window. Don't forget to place the input file named test.rvt
in the \exe\vcl5_amd64dll folder before running the application.
If it cannot find the test.rvt file, the application reports an error:
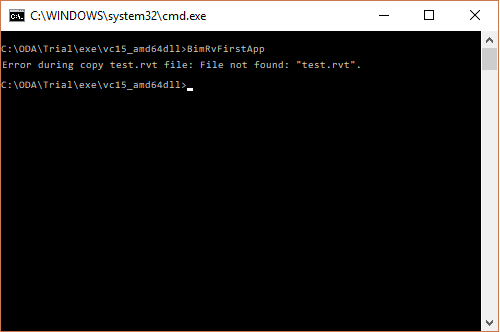
If the application successfully runs, you receive output that looks like this: